How to Install Tempered Glass Railing Systems on Your Deck

Many home and property owners today choose glass railings for balconies, pool decks, and walkways because of their aesthetic and functional appeal. Glass railings are visually unobtrusive and blend well with the surrounding architecture and environment. More importantly, they provide sturdy barriers to ensure everyone’s safety.
Below, we’ll delve into the merits of installing glass railing systems and steps on how to do it.
Benefits of Glass Deck Railings
If you’re considering choosing glass for your railing infill,, these benefits may be useful to keep in mind:
1. Unobstructed View From Indoors
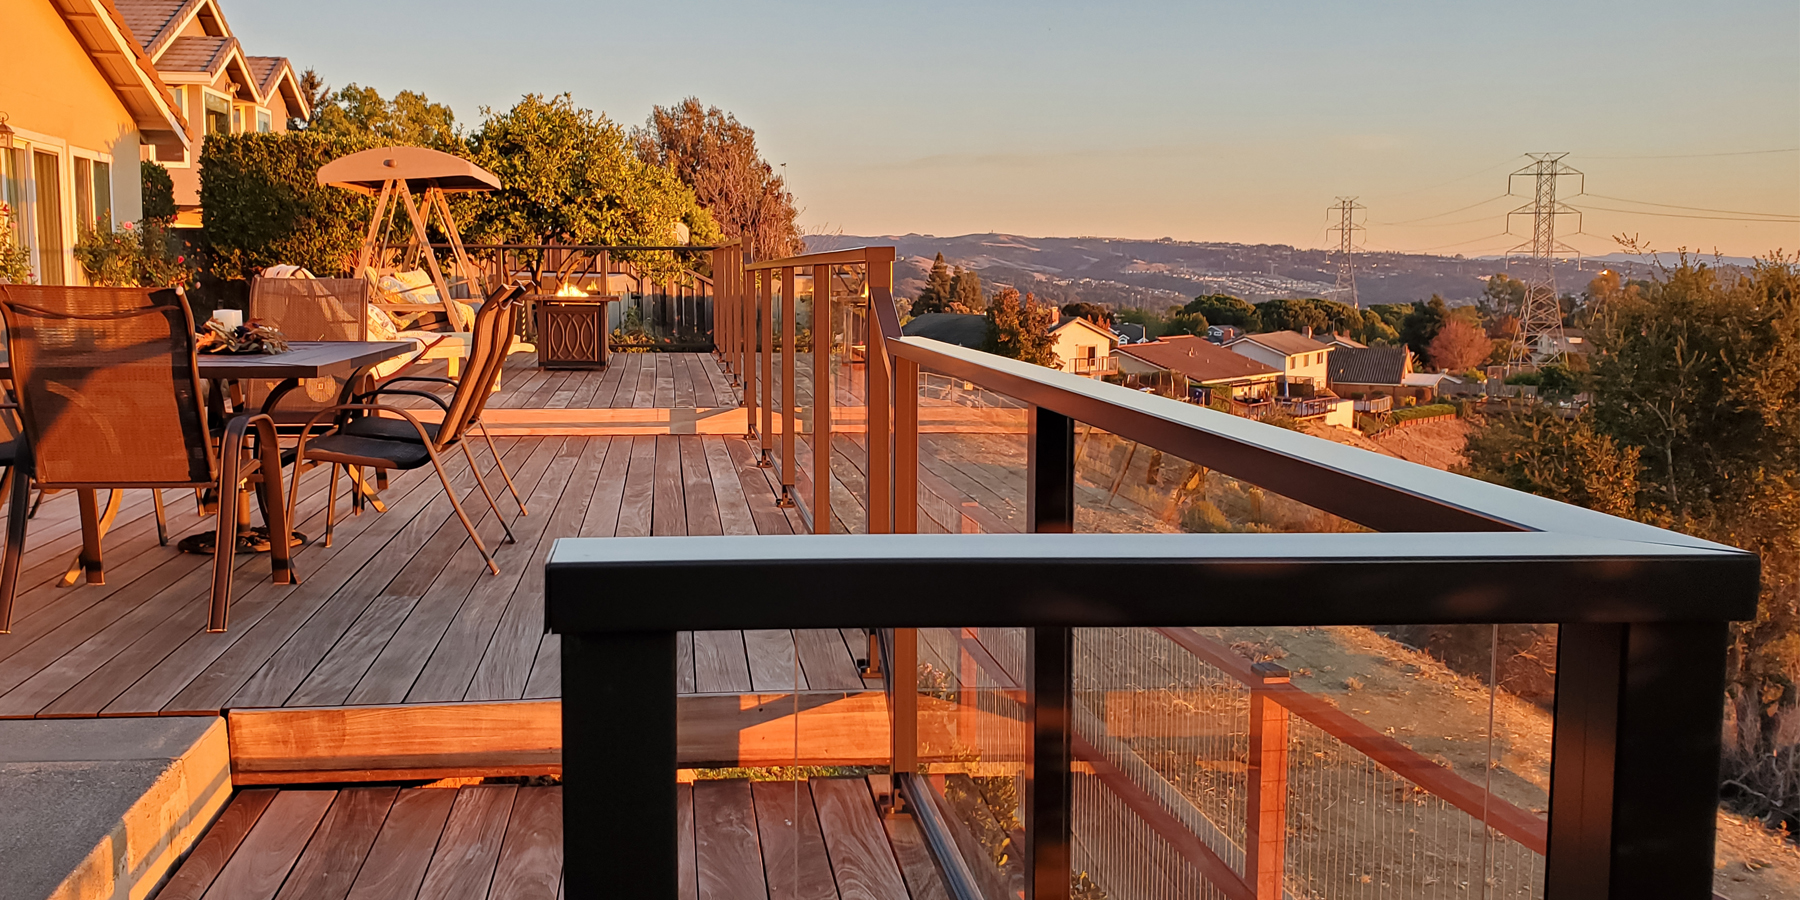
Glass railings offer a clear line of sight from inside your home, through the balcony, and to the gorgeous view beyond. This makes them ideal for properties in prime locations with breathtaking outdoor views. If you value your scenic views, make the most of it by installing tempered glass railing on pool decks and balconies overlooking picturesque landscapes.
2. Durable and Safe
People generally believe that glass is delicate and less durable than more commonly used construction materials like wood or metal. While untempered glass does indeed break easily, the tempered glass panels used in glass railings are extremely resilient.
Solid panel infill means there are no gaps between pickets which a child or pet may accidentally get stuck between, or worse, fall through. Glass railings can be as high as you want them to be, and tempered glass panels don’t break or shatter easily. They’re sturdy and hold well against the force of strong winds or extreme weather conditions and temperatures.
If you still doubt the safety of tempered glass railing, consider that high-rise condominiums and corporate buildings typically have tempered glass railings on the uppermost floors.
3. Low Maintenance
Installing glass railing instead of wood involves less maintenance. You don’t have to refinish with stains or paint yearly to keep the railing looking new and beautiful. Provided the panels have been properly coated, you only need to wipe off handprints, smudges, or splatters as they occur and occasionally hose your tempered glass railing down to remove any dirt or dust.
4. Versatile and Customizable
Hiring professionals to design and install glass railing on your property can pay off tremendously, both aesthetically and financially. Glass railing blends easily into most architectural and design styles, whether traditional or contemporary, minimalism or maximalism. Glass railings can also be customized into various shapes and sizes, which is an added benefit when you have a structurally-unique staircase or irregularly-shaped balcony or pool deck. You can accomplish much with a glass deck railing installation without sacrificing style or functionality.
5. Increases Property Resale Value
Tempered glass railing helps increase property value by making your property more attractive to buyers. It looks beautiful and doesn’t deteriorate quickly or require much maintenance. When you get more offers, your chances of meeting (maybe even exceeding) your target selling price increases.
6. Eco-Friendly
Another significant benefit of installing a glass railing to your deck or balcony is that it can serve you for decades. It is more sustainable than cheap wood, which can rot, crack, or split after several years. Durable, non-corrosive, and low-maintenance, glass doesn’t require chemicals to maintain its facade. Simple soap or non-toxic commercial glass cleaner will suffice for cleaning.
7. Quick and Easy to Install
Glass deck railing installation is easier than building a traditional railing from scratch. Anyone with sufficient handyman experience and tools can manage a DIY deck renovation on their own. As long as the glass panels are already measured, cut, and their edges polished (to prevent anyone from getting deep cuts), it’s only a matter of securing them in place – with the correct tools and framing.
Now that we’ve covered the benefits of glass deck railings let’s discuss what it takes to install one on your home or property.
Tools and Materials Required
Whether you’re planning a DIY deck renovation or hiring a professional to install a glass railing, you’ll need the following tools and materials to ensure a smooth, efficient, and safe installation.
Ideally, you should order your glass railing system from one company to ensure that all components are compatible and cut correctly to size. You may order custom glass panels from a local supplier, but that will add more steps to the procurement process. It will be more convenient to buy the glass, framing, and mounting components from the same company.
When you order a traditional, framed glass railing system from eGlass Railing, such as our eGlass Solid™ system, you will receive everything you need to complete your railing, including the following components:
- Tempered glass panels, cut to size and edges polished
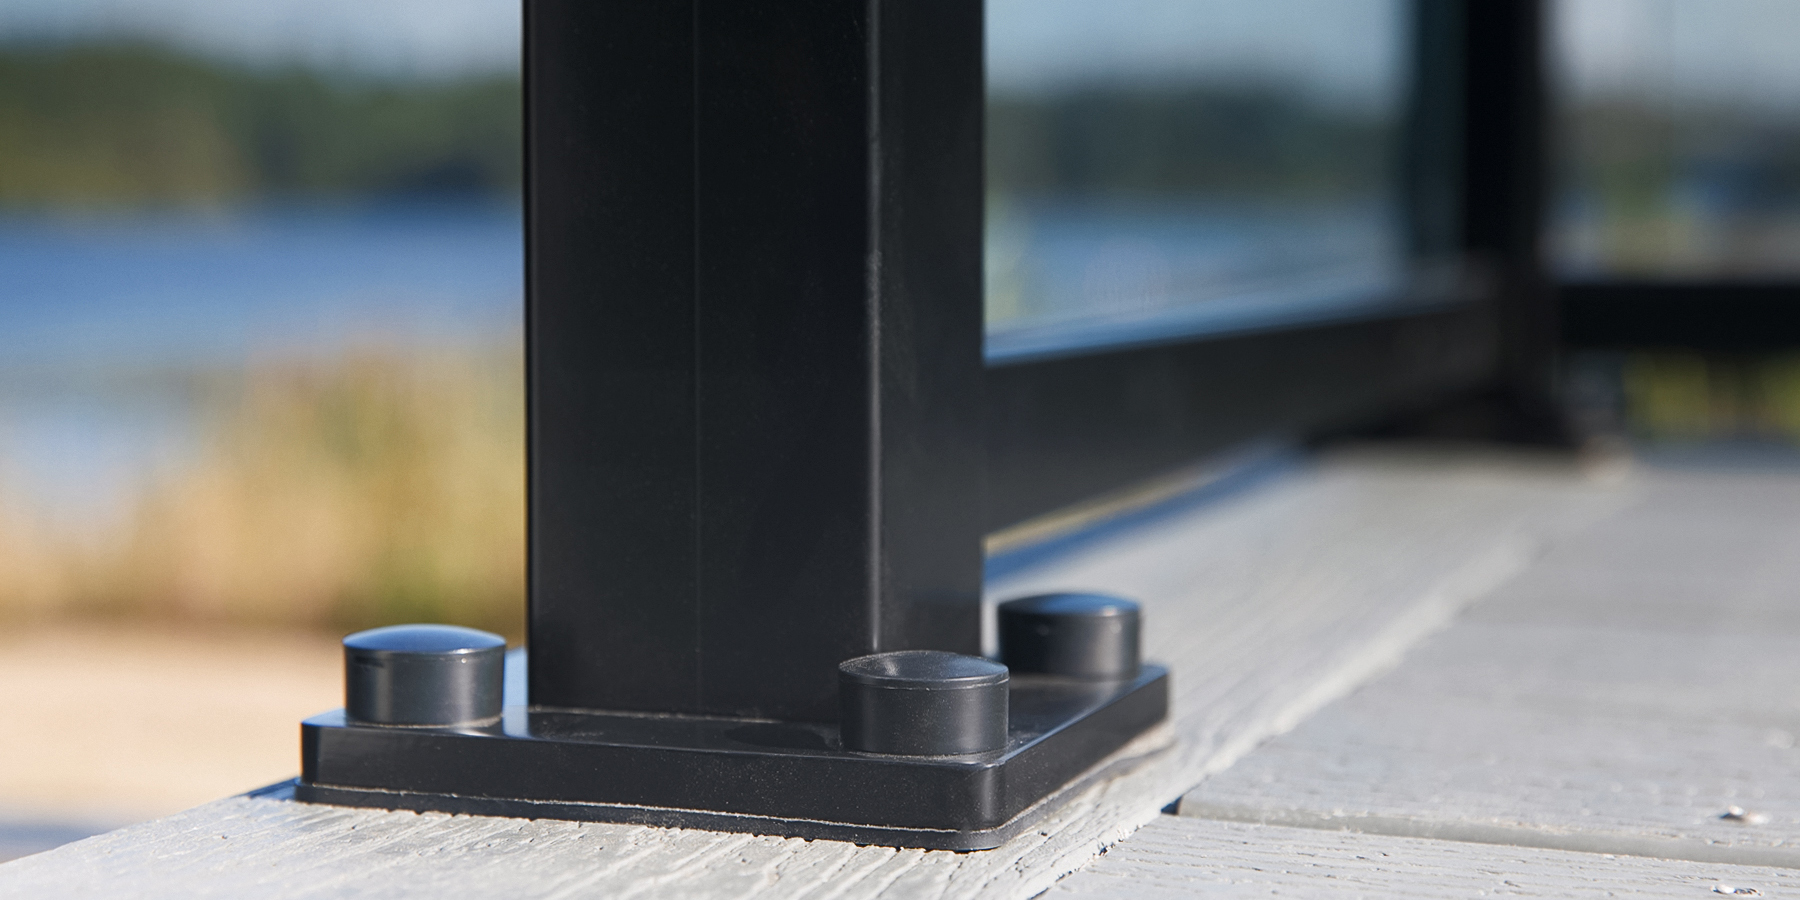
- Square posts with base plate pads or fascia mounting brackets
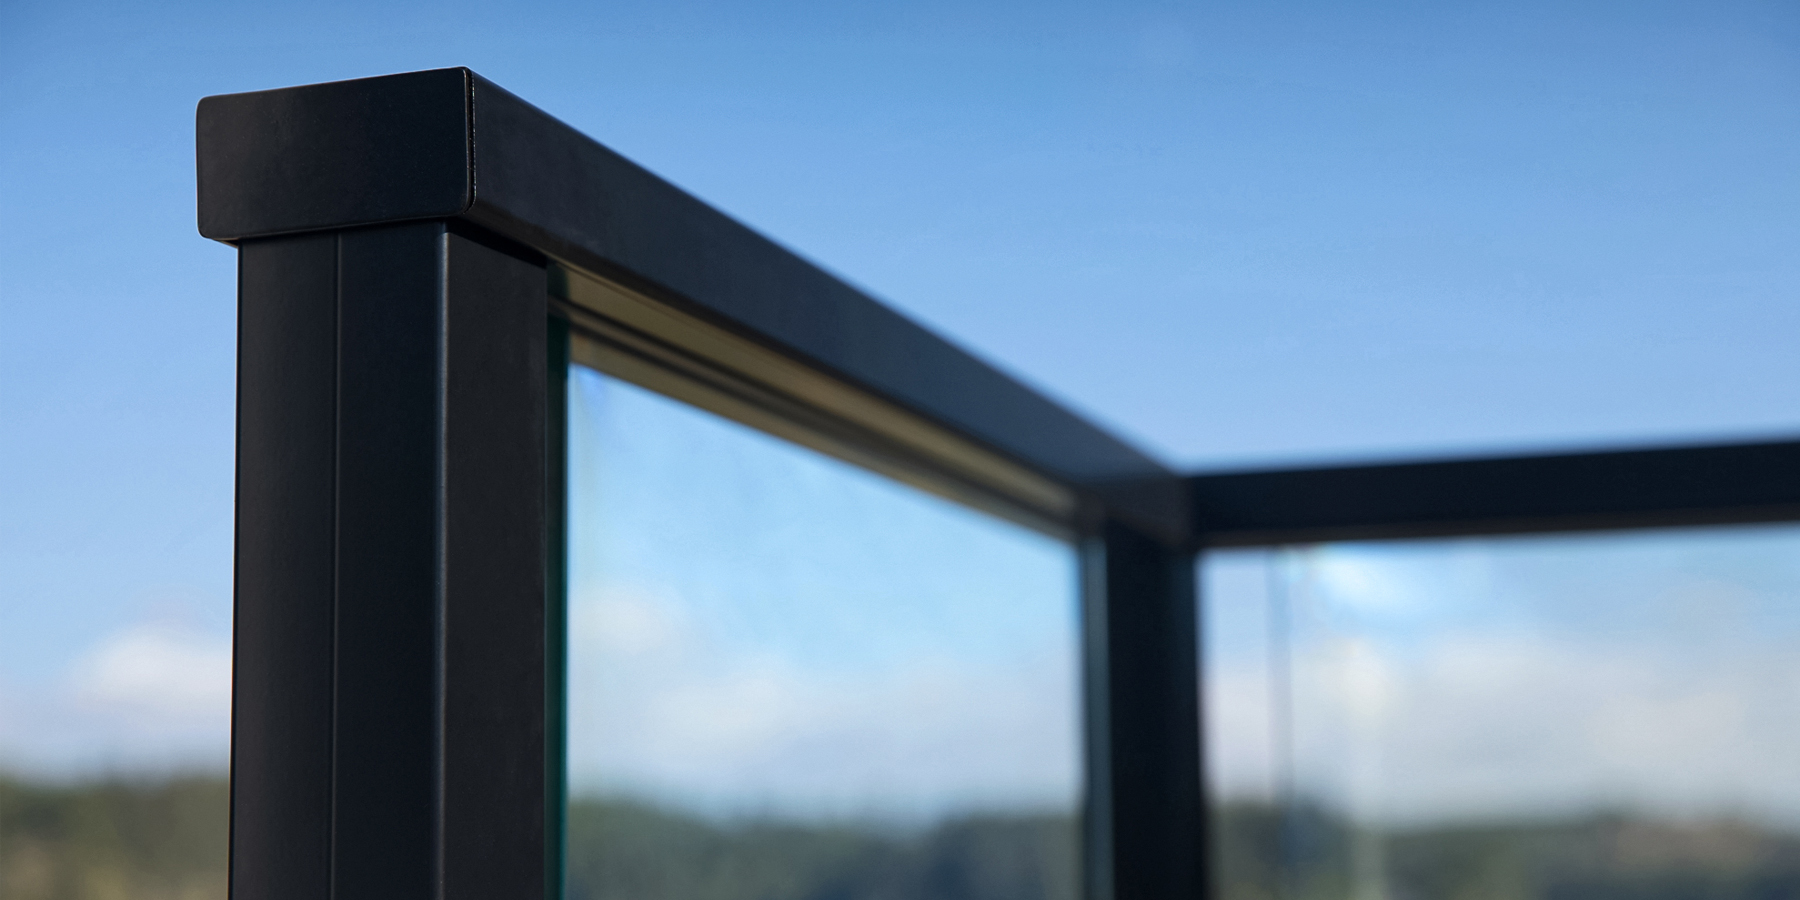
- Top and bottom rails with glass vinyls
- Drill guides
- Various necessary screws, bolts, washers, end caps, gaskets, etc.
Tools:
Prepare all these tools before starting so that your glass deck railing installation goes smoothly.
- Protective gear: Safety glasses, gloves, ear protection
- Measuring tape
- Felt tip marker
- Power tools and bits: Chop saw or miter saw, electric drill, impact driver, drive bits
- Builder’s level
- Small file
- Dead blow hammer
- Painter’s tape
- Screwdriver kit
- Foam glass cleaner
- Touch up paint
Pre-Installation Tips
- If you ordered a custom glass railing system, you should receive all materials in one shipment. Check the itemized parts in the packing slip and make sure no components are missing. If certain components are backordered and must be shipped separately, our sales team will communicate this with you.
- A single crack can quickly run across the length of the panel, which can be very dangerous for anyone who leans on the unstable glass. Make sure the glass panels are in perfect condition before installation to ensure the safety of the tempered glass railing.
- When taking the DIY route, have one or two strong assistants to help you lift the glass and ensure each panel is positioned properly between the rails or clamps.
- Review the instruction guide and lay the materials and components out on the floor so you can have a clear picture of where each part goes. For example, if one post requires x number of screws, prepare the correct number for each post.
- Only install enough posts to install one glass panel at a time to ensure that the spacing between posts is correct.
- Schedule the installation early in the day.
Step-by-Step Guide to Install Glass Railing
Part 1: Prepare and Install the Posts
For Deck-Mounted Glass Railings:
- Review the installation layout guide and mark the spots on the deck where your posts should stand. Ideally, the base of each post should be 1” to 2” away from the edge of the deck or far enough that the outside mounting screws can screw into the perimeter deck joist. Start from the corners farthest from your house, then work your way inwards.
- Repeat the step above, but this time for the posts for the stair run.
- Attach the drill guides to the posts using painter’s tape. Note that the drill guide is only for posts in an inline (straight) run. Reference your layout guide for stair post cutting guidance.
- The drill guides should indicate the correct height for each post. Mark it with a felt tip marker and cut the square post with a miter saw.
- Use the small file to smooth the cut end, then coat it with touch-up paint to protect against corrosion.
- Screw the base plate to the bottom of each post using an impact driver.
- Starting at the farthest corner, position the post with the base plate on the spot you marked on the deck.
- Use the felt tip marker to mark the base plate holes. Remember to check that the outside screws for the base plate land on the perimeter deck joist.
- Pre-drill the holes on the deck halfway through.
- Attach the base plate pad to the base plate.
- Screw the base plate to the deck. Don’t tighten the screws or screw the cap covers yet because you may need to make minor adjustments as you install the rest of the inline posts.
TIP: Wrap the post with painter’s tape to protect it from scratches and debris when you use the drill or impact driver.
- Use a level to check if the post is standing straight upright.
- Repeat for the rest of the inline posts.
For Fascia-Mounted Glass Railings:
- Review the installation layout guide and mark the exact spots on the edge of the deck where the posts will go.
- Attach the rubber pads to the wings of the fascia brackets.
- Hold the corner fascia brackets up in position against the fascia board and mark the spots with a felt tip marker. Also, mark one of the holes for the mounting screws.
- Repeat the same process for the inline fascia brackets and ensure the spacings are correct.
- Pre-mount the inline posts to the inline fascia brackets. Follow the instructions on which screws to use and where.
- Drill the first pilot hole and screw the mounting hardware through the bracket and halfway into the fascia board. Take the level and ensure the post is plumb (perfectly vertical), then mark the remaining three holes for the mounting screws.
- Remove the bracket and drill the pilot holes for the three holes. Repeat for the rest of the inline posts.
- Starting from the corner railing, mount the fascia brackets and posts to the deck following the instructions.
Part 2: Install the Top and Bottom Rails
Installing the Bottom Rails:
- Tape the drill guide to the inline posts and mark the spots for the rail connecting blocks or RCBs (the components that hold the top and bottom rails in place).
- Drill the pilot holes, then coat the cuts with touch-up paint to protect the post from corrosion.
- Mount the RCBs following the provided instructions.
- Measure the distance between the bases of the posts.
- Cut the bottom rails based on these measurements. File the ends and coat with top-up paint to prevent corrosion.
- Drill two clearance holes on each bottom rail at 1.25″ from the ends.
- Install the bottom rails. You may have to loosen some bolts on the base plates a little so you can pull the posts away. This should give you the space you need to slide the bottom rails in place on top of the lower RCBs without scratching the posts. Don’t screw them in yet.
- Use the level again to plumb the post and level the rails (check if they are perfectly horizontal).
- Screw the rails in place using the fasteners or screws provided.
Installing the Top Rails:
- Install the mounting brackets and washers on each post. Follow the instruction guide provided, especially when attaching mounting brackets on corner posts.
- Position the top rails in place over the mounting brackets and mark the correct lengths.
- Cut the top rails to size, file the ends, and coat them with touch-up paint to prevent corrosion.
TIP: The very ends of the top rails should have an excess of 1/8″ to 1/4″ beyond the last posts so that you can fit the end caps over them.
- Place the top rails in place again and use the level to ensure they are perfectly horizontal and the posts stay plumb. The edges of each piece should touch seamlessly. Use the dead blow hammer to position the rails in place and ensure the entire top rail system is level.
- On the underside of the top rails, pre-drill the holes through the mounting brackets and into the top rail.
TIP: Alternate drilling and leveling the top rails to ensure they are level.
- Screw the top rails in place.
- Mask the corners and visible edges with tape. Caulk and sand to smoothen.
- Measure the distance between the posts and mark the top rail infill 1/16″ shorter. Cut and pop the infill into the underside of the top rail.

Part 3: Install the Inserts and Underside Covers
- The top rail’s bottom edge and the bottom rail’s upper edge should have openings for glass vinyl inserts. Measure the distance between two posts and cut glass vinyl inserts for the top and bottom rails.
- Insert the top glass vinyl into the top rail infill from the underside.
- Clean the bottom rail and insert the bottom glass vinyl in place.
- Cut the underside cover using the same measurements and attach it to the underside of the bottom rail. The covers should snap in place.
- Repeat for every section between posts.
Part 4: Install the Glass Panels
- With the help of an assistant, lift a glass panel and center it between two posts.
TIP: Apply a lot of foaming dish soap to the top and bottom glass vinyl inserts. This makes it easier to slide the glass panels in place. Note that it’s very difficult to move the glass panels once you insert them, so attempt to get the position right the first time.
- Insert the glass panel into the top rail glass vinyl at an angle, then slowly push up until the top edge of the glass is fully seated into the glass vinyl insert.
- Straighten the glass and align the bottom edge with the bottom rail vinyl. Insert the glass and make sure the panel is fully seated.
Part 5: Finishing Touches
- Mark a weep hole near the bottom of each post. It should be on the side facing outside the deck.
- Drill the weep holes
- Coat the edges of the holes with touch-up paint to prevent corrosion.
- Attach the end caps to the ends of the top rails. The caps should be fully seated. If you’re having trouble inserting the caps, cover them with a cloth and use a dead blow hammer to tap them in place.
This is how you install tempered glass railing systems for a DIY deck renovation! You can enjoy how your glass railing looks and hang out safely on your balcony or deck immediately after the installation.
Post-Installation Care and Maintenance Tips
- Clean up the work site immediately after installation to prevent accidental scratches on the glass.
- To clean tempered glass, you can lightly dust the surface with a microfiber cloth to remove loose dirt. Alternatively, you can hose down the glass panels (dirt and dust slide off easily from coated glass).
- For hardened stains and grime, soak the area with a water-and-vinegar solution, diluted liquid dish soap, or glass cleaner. Once the grime softens, wipe or wash it off with water.
TIP: Adding a bit of pure lemon extract can help dissolve the grime fast without removing the glass’s natural shine.
- Dry the glass with a clean, dry, lint-free cloth. Wipe the bottom rail, too, and remove as much moisture as possible.
Install Glass Railing Customized for Your Property
Glass railing installation is generally DIY-friendly, as demonstrated above. However, it gets challenging when you have to do a lot of customization on your own. It will be easier if you have a complete glass railing system with the primary materials – railings, posts, and glass panels – already designed to fit your deck, balcony, staircase, or any space where you want to install a glass railing.
There’s no need to look further for a company that offers railing layout services and custom railing systems. eGlass Railing, a consulting and railing company that develops various glass railing systems, can provide what you need. We help you pick the best railing system for your property, develop a bill of materials, and provide installation advice over the phone. We ship directly to customers from our warehouse in Washougal, WA., and can send eGlass Railing™ systems anywhere worldwide.
Schedule a consultation with our railing experts and request a free quote.